How you draw the gun from a holster is critical.
![]()
![]()
Drawing a gun from a holster is a critical skill that too few gun owners practice enough. It’s not because they don’t want to, but rather because most of us spend a great deal of time shooting at indoor ranges where drawing from a holster is not allowed for safety reasons. Instead, we pick the gun up from a bench and shoot standing still. While this type of marksmanship practice has its place, it does little to help prepare for a real-world encounter where we will likely draw the gun from a concealed holster to engage the bad guy.
Now before you ask, “How hard can it be to pull a gun out of a holster?” understand the draw involves a lot more than simply pulling a gun up and out. The purpose of drawing the gun is to get it on target as quickly and smoothly as possible. This complicated process can be broken down into four major steps.
Grip the Gun
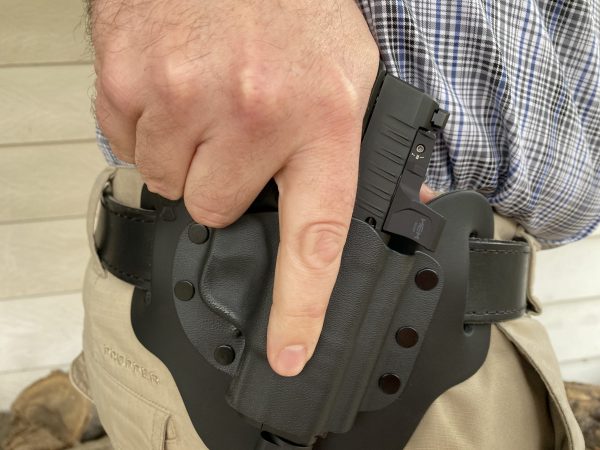
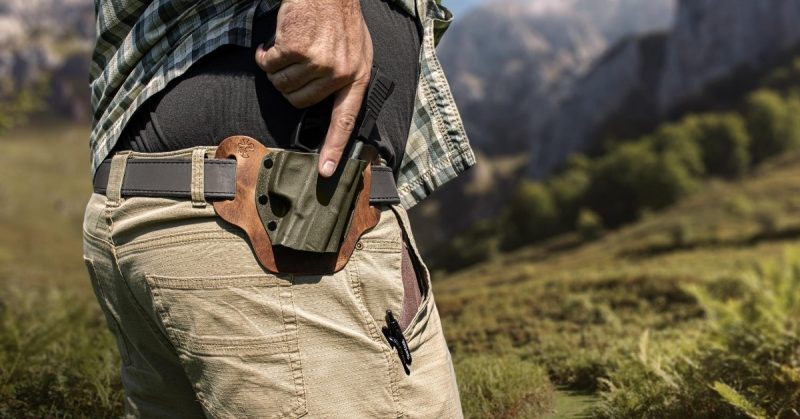
The first step is to grip the gun firmly with your dominant hand. This involves first understanding the fundamentals of gripping the gun when you shoot and then applying that grip to the gun on the draw. Place your hand high on the backstrap, closing the gap between the web of your thumb and forefinger and the underside of the beavertail. Your thumb should slide between the gun and your body while your trigger finger is kept straight along the outside of the holster, in line with the frame of the gun, as your other fingers wrap around the grip.
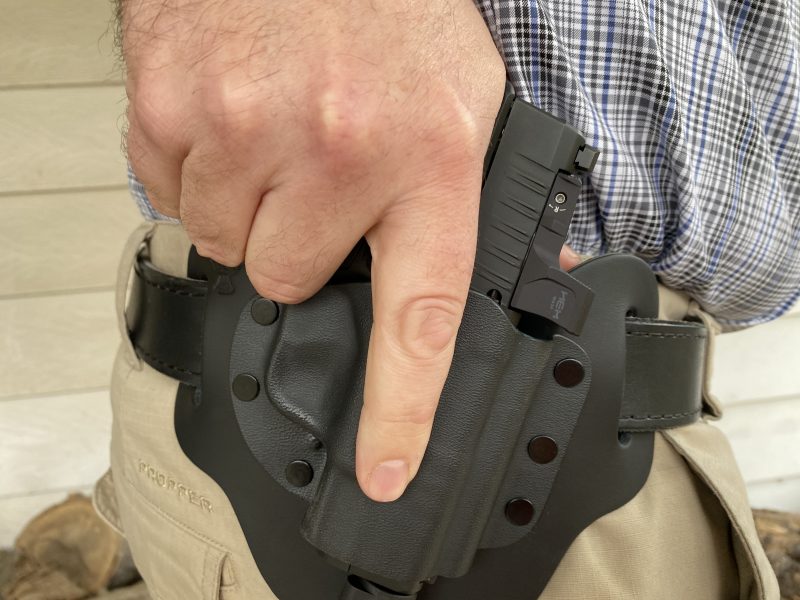
Whether you plan to shoot one-handed or two-handed, place your support hand flat on your chest to get it out of the way and prevent muzzling it. It will also be easier to add it to the gun if you are shooting with both hands.
Pull Straight Up
The most efficient way to extract the gun from the holster is straight up, the way the holster is designed. So step two is to pull the gun straight up toward your armpit. Do not rotate the gun in this step. That comes next. For now, make sure the gun comes completely out of the holster, clearing the top so it won’t interfere with the next step. As you do this, remember to keep your trigger finger along the rail of the gun, NOT near the trigger. Your gun is not on target and you are not ready to shoot. The last thing you want at this point is to accidentally discharge the gun right down your leg.
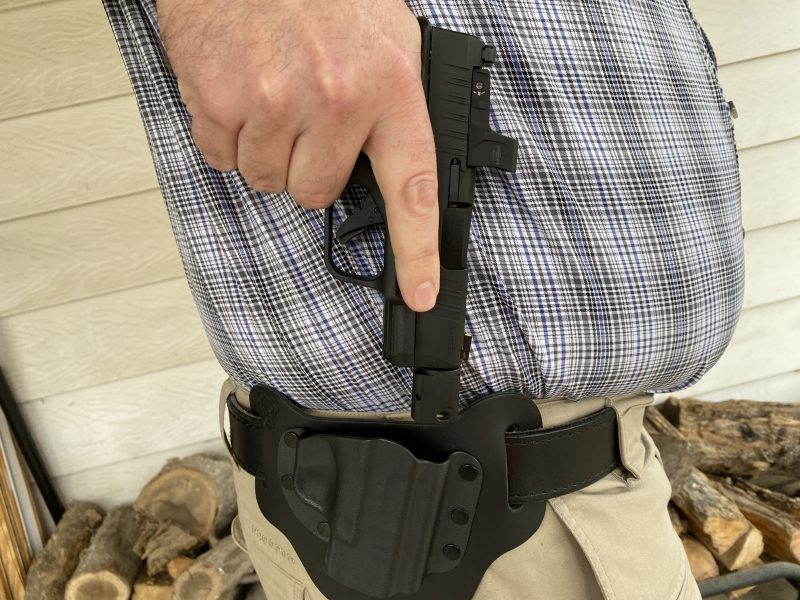
Rotate the Gun Toward the Target
This is where many shooters goof up, so pay close attention to what happens next. Efficiency is the name of the game in this step so you won’t waste motion bringing the gun up. With the gun pointed down over the holster and your finger off the trigger, drop your elbow as you rotate your wrist to bring the gun parallel to the ground and pointed downrange. This is a critical step regardless of how close your target is. In a perfect world, you would be able to engage your target by fully extending your arms, getting your sights lined up, and squeezing the trigger smoothly for a cleanly aimed shot. (Then again, in a perfect world, you wouldn’t need to shoot anyone, but I digress….) However, if your attacker is within arm’s reach, you won’t have that luxury and may have to engage with the gun right by your body, called “shooting from retention” because you’re keeping the gun close enough to retain it and prevent the bad guy from taking it away. If needed, you can shoot from this position and likely hit your target.
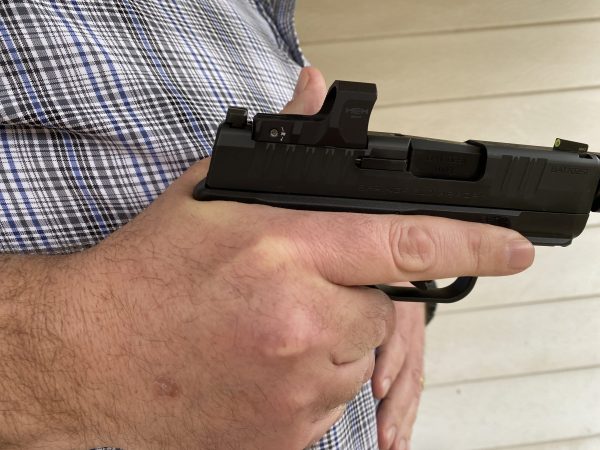
Join Hands
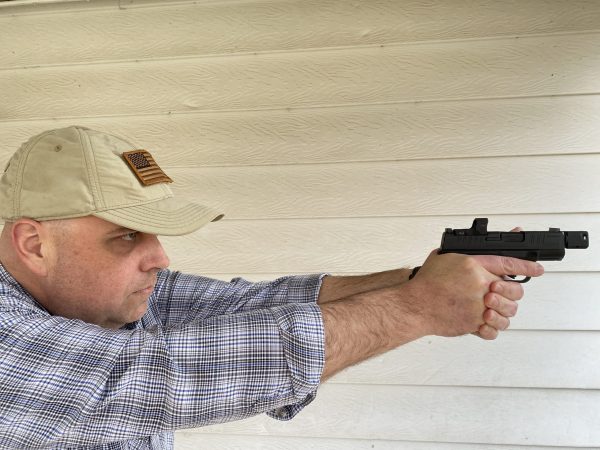
However, most of the time you will have the luxury of shooting from full extension. So now it’s time to add your other hand to the grip. Remember, your support hand should already be resting flat against your chest, ready to be added and away from the muzzle. As you drive the gun straight forward with your strong hand, add your support hand to the grip, joining them on the gun. This motion should result in the gun being right in line with your eyes. Resist the temptation to bring your head down to the gun. Instead, bring the gun up to eye level so you can see the sights correctly. Note how the eyes stay forward on the target the entire draw so you can maintain target awareness in case things change.
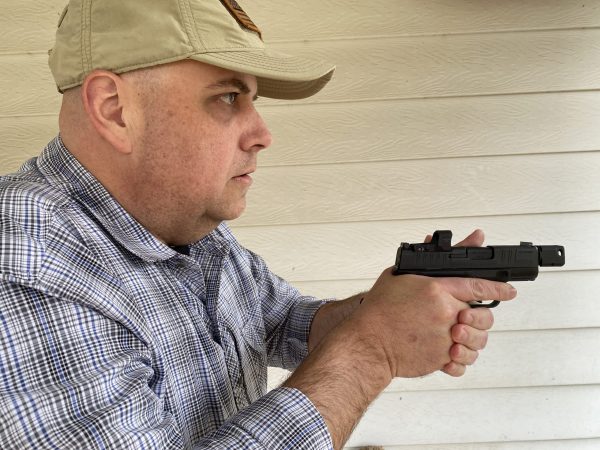
Once you are on target and decide that shooting is the correct course of action, drive the gun straight out rather than arcing the gun up or down. Driving it straight out gains maximum efficiency and accuracy. When the gun is on target and you are ready to shoot, now – and only now – can you put your finger on the trigger. Up until the moment you fire, your finger should remain safely off the trigger so nothing unintended happens.
Practice, Practice, Practice
As is the case with so many skills, this is not a one-and-done kind of thing. You will only get better by practicing. In the heat of battle – whether it’s a deadly force encounter or competition – you will fall back on your highest level of training. If your highest level is that you tried this once, you probably won’t perform well under pressure. In a deadly force encounter, that could cost you or a loved one their life.

Find a range that lets you practice draws, or practice at home under dry fire conditions with no ammunition in the gun. If it ever comes down to you vs. a bad guy, you’ll be glad you did.
ABOUT THE AUTHOR:
David Workman is an avid gun guy and a contributing writer to several major gun publications. As an NRA-certified instructor, David trains new shooters on basic handgun skills and CCW requirements and is a strong advocate for training as much as you possibly can. “Real-life shootouts don’t happen at a box range.”
![]() You may also enjoy these popular articles:
You may also enjoy these popular articles:

©MTC Holsters, LLC and CrossBreed Holsters Blog, 2021.
Unauthorized use and/or duplication of this material without express and written permission from this site’s author and/or owner is strictly prohibited. Excerpts and links may be used, provided that full and clear credit is given to David Workman and the CrossBreed Blog with appropriate and specific direction to the original content.
![]()

